Global Picklists – Do’s and Can’t Do’s

Global Picklists – Do’s and Can’t Do’s
Recent Articles
Global Picklists – Do’s and Can’t Do’s

After a recent technical safari into the world of Global Picklists, we found some facts that may be of interest to anyone heading in that direction. Hopefully, this will alleviate some of the confusion and contradiction surrounding the topic.
Probably the main thing about Global Picklists is that you may use them in several places across your org but only have to edit them in one place. It is a huge time saver, saves your organization the possibility of errors, and allows for clear reporting throughout the lifecycle of your data. You may also want to check on the myriad ways to use Global Picklists within record types and page layouts as we will be doing in future blog posts.
Please feel free to comment on this subject below, as we would love to hear from you.
#1 – What’s in a name?
That’s right! Over the years, Salesforce has used four different naming conventions for the same thing. So you can pretty much use these names interchangeably. Around here, we call them “Global Picklist Value Sets” or “GPs” or “Those things that you can’t promote to a global value set if it’s a standard picklist.” Read on…
#2 – What you can’t do with Global Picklists
THE NUMBER 1 THING YOU CAN’T DO
You can not promote a standard picklist to a Global one, no matter how hard you try. This would save a considerable amount of time. A lot of folks are asking for this, and you can get on the bandwagon by up-voting it here: https://success.salesforce.com/ideaView?id=0873A000000LmbVQAS.
# 3 – How to promote an existing custom picklist to a Global Picklist
Ok, let’s dig into some hands-on customizing. There are two ways to create a Global Picklist – 1. Promote an existing custom picklist or 2. Create a new one. We are going to explore option number 1 first. Promoting an existing custom picklist to a Global one.
First, let’s create a new sample picklist on the Opportunity object in your org of choice – sandbox, production, de org, etc.
Go to Setup > Object Manager > Opportunity > Fields & Relationships > New

After you click the New button, choose picklist and click Next.
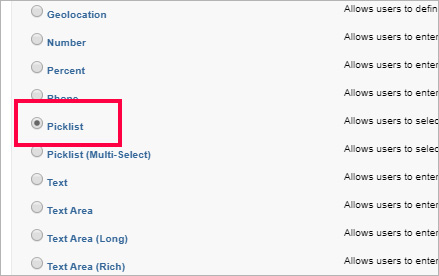
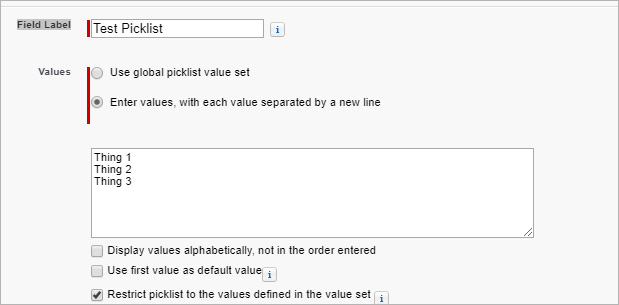
Now fill out the field info accordingly:
Field Values = Test Picklist
Values – Choose the radio button that denotes “Enter values, with each value separated by a new line”
Fill in the form with test values = Thing 1, Thing 2, Thing 3
Leave all the other values to default and click Next. Click Next again and then click Save.
So now that you have your new picklist created, let’s promote it to a Global Picklist!
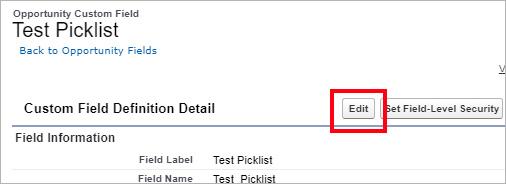
Again, go to Setup > Object Manager > Opportunity > Fields & Relationships > Find the new picklist (Test Picklist) and click on the name and then click the “Edit” button.
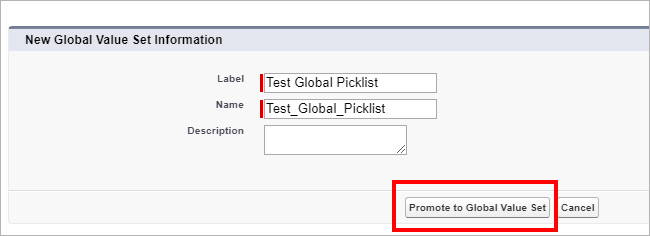
Next click the “Promote to Global Value Set” button.

Fill out the fields as below and click the “Promote to Global Value Set Button”.
So that’s it! You have created a custom picklist and promoted it to a Global Picklist. So how do you edit the new Global Picklist if you need to? There are two different ways to get to the Global Picklist that you just created in case you want to view, edit, delete, deactivate or add new values.
1- Go to Setup > Object Manager > Opportunity >Fields & Relationships – Find the picklist in the field listing and click on the name. Then click the button below:
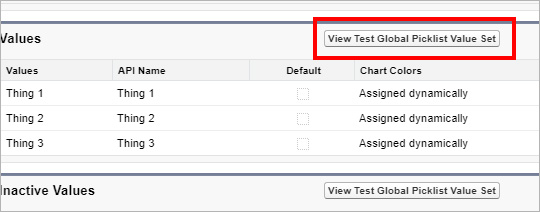
After clicking the button above you will be on the Global Picklist that you created and will be able to view, edit, deleter, etc.
2- To go straight to your Global Picklist go to Setup > Type “Picklist Value Sets” into the quick find box and click on Picklist Value Sets and then click on the name of your Global Picklist. Edit the picklist whichever way you need to and that’s it.
#4 – Create a new Global Picklist
To create a new Global Picklist from scratch simply go to Setup > Type “Picklist Value Sets” into the quick find box and click on Picklist Value Sets and then click on the “New” button as below:
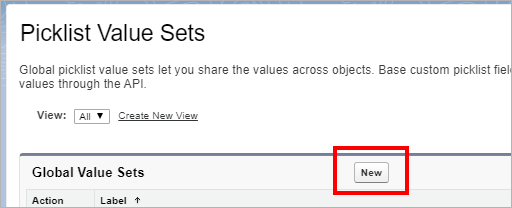
Fill out the fields as below:
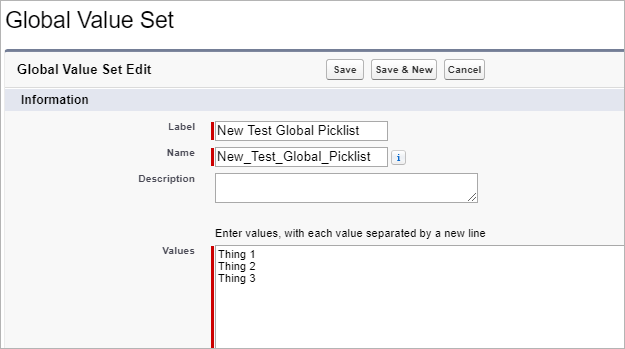
Click “Next” and “Save”. All done! You will notice that it is much like creating a regular picklist.
Now you will want to know how to add this Global Picklist to an object.
Go to Setup > Opportunity (or any object where you want to place the Global Picklist) > Fields & Relationships > New
Choose Picklist from the field type options and then click “Next”
Fill out the fields as below:
Field Label = “Whatever you want to call it”
Value – Make sure you choose the radio button that denotes “Use global picklist value set”
Click the dropdown – and choose one of the Global Picklist that you have already created.
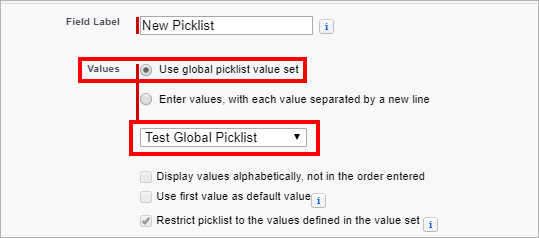
Now click “Next” then “Next” again and “Save”
That’s it! Well done! You have just completed the hands-on portion of this blog.
If you found this helpful, or have any questions,please reach out:


