How To: Embed Tracking Pixels into a Marketing Cloud Account Engagement (Pardot) Form
How To: Embed Tracking Pixels into a Marketing Cloud Account Engagement (Pardot) Form
Recent Articles
How To: Embed Tracking Pixels into a Marketing Cloud Account Engagement (Pardot) Form

Primary Use: Used for Re-targeting in Facebook and LinkedIn.
How to Get Tracking Pixels
In this article, we’ll cover how to create and install a pixel on your website. To learn more about the pixel before getting started, check out the benefits of installing a Facebook pixel.
If you already created a pixel and want to find your pixel base code, skip to section 2, Add the Facebook pixel to your website. Follow the instructions to Manually add pixel code to website.
Before you begin
- You need a website for your business.
- You must be able to update your website’s code.
Create a Facebook pixel
- Go to Events Manager.
- Click Connect Data Sources and select Web.
- Select Facebook Pixel and click Connect.
- Add your Pixel Name.
- Enter your website URL to check for easy setup options.
- Click Continue.
Add the Facebook pixel to your website
- Manually add pixel code to website
- Use a partner integration
- Email instructions
Set up events
After you add the pixel base code to your website you can set up events to measure the actions you care about, like making a purchase. You can do this by manually installing the code or by using the point-and-click Event Setup Tool. Then, make sure that your pixel is working correctly.
You can use one pixel across your whole website, including multiple pages of your website.
Note: Apple’s iOS 14 changes require apps in the App Store that engage in what Apple defines as “tracking” to show a prompt to iOS 14.5 and later users in accordance with their AppTrackingTransparency framework. These changes impact how Facebook receives and processes events from tools like the Facebook pixel. If you optimize, target or report on web events from Facebook pixel or any of our other business tools, you can take steps to update your event setup and manage these changes. Learn more.
The LinkedIn Insight Tag is a lightweight JavaScript tag that powers conversion tracking, website audiences, and website demographics for LinkedIn ad campaigns. The Insight Tag should be incorporated as a standard component of your website’s pages to enable these LinkedIn Marketing Solutions features.
To add the LinkedIn Insight Tag to your web pages, you’ll need to access your unique LinkedIn Insight Tag JavaScript code first:
- Sign in to Campaign Manager.
- Click the correct account name.
- Move your cursor over the Account Assets tab in the top navigation bar and select Insight Tag from the dropdown.

- Click Install my Insight Tag.
- Select the method you’d like to use to install your tag. To see the tag code, select I will install the tag myself.
From there:
- Copy the entire Insight Tag code from the window.
- Click I’m done.
- Add the JavaScript code to every page on your domain, preferably right before the end of the <body> tag in the global footer.
- Once we receive a signal from the tag you’ve placed on your website, your domains will appear under Insight Tag.
Important:
- Our system will wait for an associated domain or URL to load (be visited) to check if the LinkedIn Insight Tag has been placed correctly. Until the tag fires on the relevant page, domains won’t appear on your Insight Tag page. Once the domain is verified it’ll be listed as Active and the chart will display the last time we received a signal from your tag on that domain.
- It may take up to 24 hours after loading the page for the dashboard to validate the domain or conversion. In some cases, domain validation may take only a few minutes.
- Google recently implemented changes for cookie tracking, which require sites to explicitly label the third-party cookies that can be used on other sites. Cookies without proper labeling won’t work within Chrome browsers which can affect your reported conversions and website audiences. To ensure your cookies function properly in Chrome browsers:
- Update the SameSite attribute to None, which will send cookies via first-party and third-party requests from your website.
- Add the Secure label to your cookies to ensure they are read and sent over HTTPS connections. Failure to add the label will result in the rejection of the cookies by Chrome browsers.
Domain Statuses:

Marketing Cloud Account Engagement (Pardot) Set Up
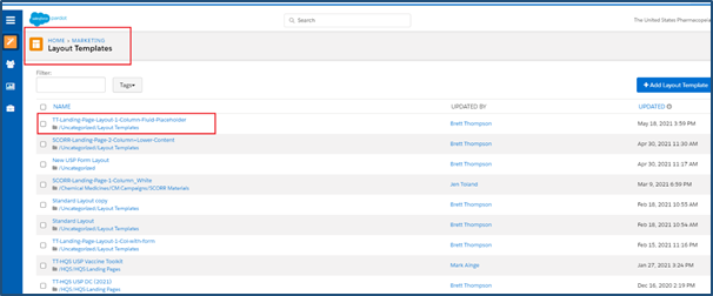
Navigate Marketing, user will click on “Layout Template” and then select the respected template on which tacking pixels should be embedded.

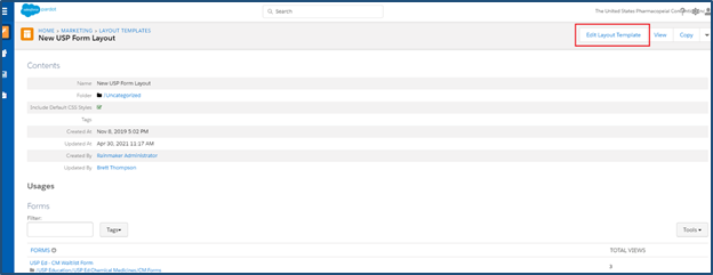
Click on “Edit Layout Template”

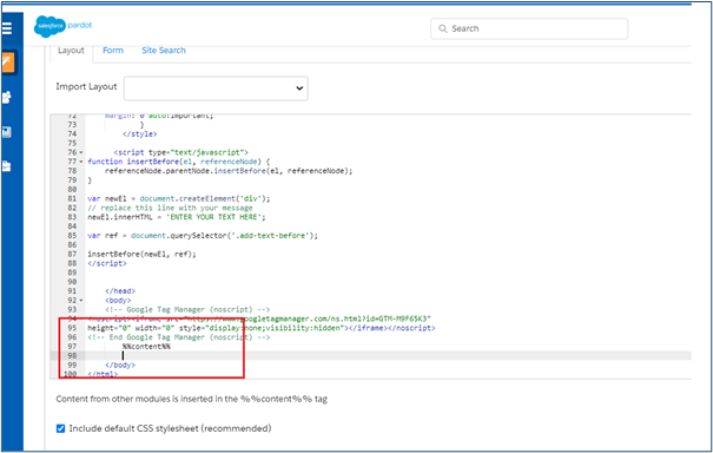
Place the tracking pixels in the <body></body> section of the HTML code and save the template

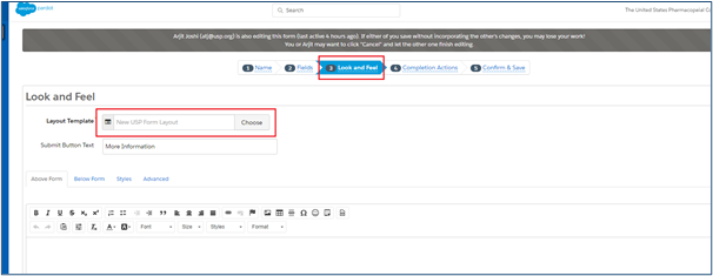
Then Navigate Forms, select the respective form – Edit Form – Look and Feel – Choose the template (Having the tracking pixels) – Save the Form

Congratulations and Voila! You have just embedded your tracking pixels into Marketing Cloud Account Engagement (Pardot). If you found this helpful or would like more information about how we can help grow your business, reach out below.


